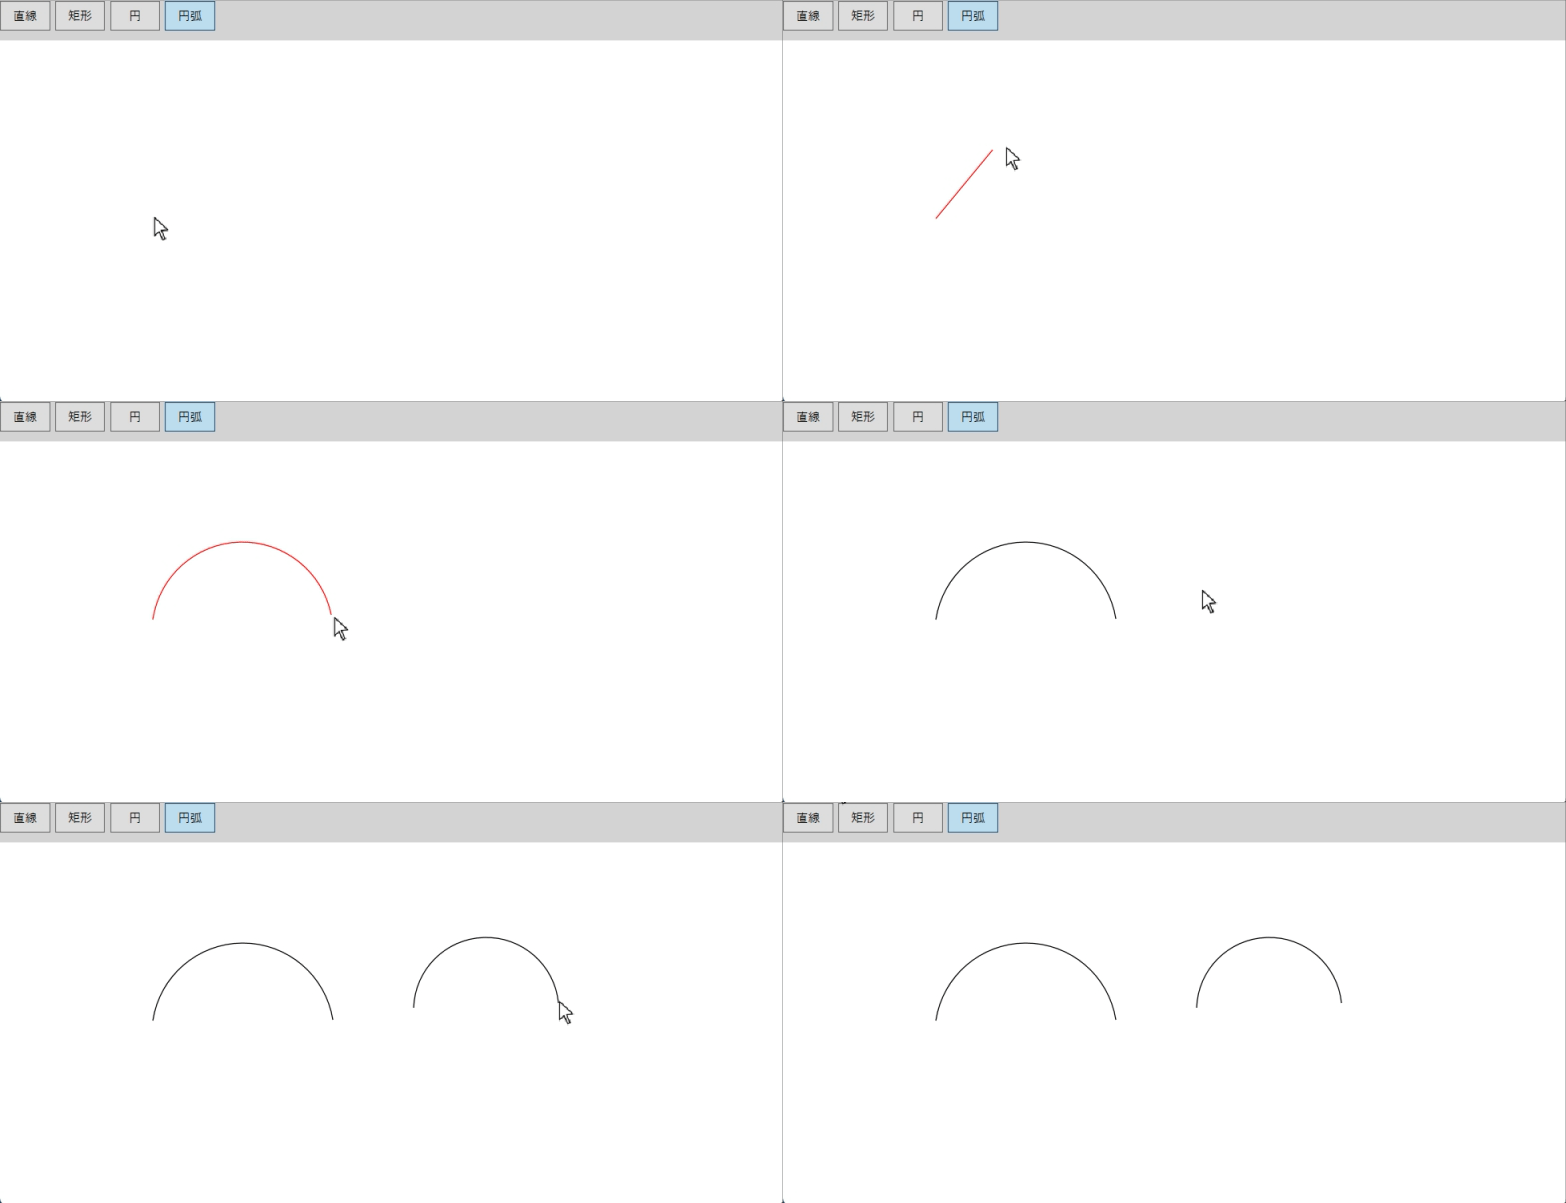
前回は基本図形の作成方法を紹介しましたが、今回記事ではC#/WPF を使用して 3 点を指定して円弧を描画する方法を実装します。この機能はCADツールの基本的な要素であり、正確な図形作成に欠かせません。以下の内容に沿って実装を進めます。
今回のゴール
- 円の中心を計算: 3点を通る円の中心と半径を求めます。
- 円弧の角度を計算: 指定された3点に基づいて円弧の開始角度と終了角度を算出します。
- 円弧の描画: ユーザーが指定した3点を使用して、円弧を描画する。
実行結果:

コード実装
UIにツールボタン「円弧」を追加
<StackPanel Height="50" Orientation="Horizontal" Background="LightGray">
<ToggleButton Content="直線" IsChecked="{Binding ToolType, Mode=TwoWay, Converter={StaticResource EnumToBoolean}, ConverterParameter=Line}" />
<ToggleButton Content="矩形"  IsChecked="{Binding ToolType, Mode=TwoWay, Converter={StaticResource EnumToBoolean}, ConverterParameter=Rectangle}" />
<ToggleButton Content="円" IsChecked="{Binding ToolType, Mode=TwoWay, Converter={StaticResource EnumToBoolean}, ConverterParameter=Circle}" />
<ToggleButton Content="円弧" IsChecked="{Binding ToolType, Mode=TwoWay, Converter={StaticResource EnumToBoolean}, ConverterParameter=Arc}" />
        </StackPanel>
DrawToolTypeに「Arc」を追加
/// <summary>
    /// ツール タイプ
    /// </summary>
    public enum DrawToolType : byte
    {
        /// <summary>
        /// 線
        /// </summary>
        Line,

        /// <summary>
        /// 矩形
        /// </summary>
        Rectangle,

        /// <summary>
        /// 円
        /// </summary>
        Circle,

        /// <summary>
        /// 円弧
        /// </summary>
        Arc,
    }
これでユーザが円弧の作図種類を選択できるようになります。次は円弧の描画ロジックを実装します。
円弧計算ロジックの追加
Models フォルダに新しいファイル GeometryHelper.csを追加します。円弧生成のための計算ロジックを定義します。
- CalculateCircle:3点(円弧の開始点、中間点、終点)を基に円の中心と半径を計算する
- CalculateAngles:円弧の中心、開始点及び終点を基に円弧の開始角度と終了角度を計算する
using System;
using System.Windows;

namespace HiCad.Models
{
    public class GeometryHelper
    {
        /// <summary>
        /// 3点を基に円の中心と半径を計算
        /// </summary>
        /// <param name="p1">円弧の始点</param>
        /// <param name="p2">円弧上の中間点</param>
        /// <param name="p3">円弧の終点</param>
        /// <returns>円の中心、半径</returns>
        public static (Point center, double radius) CalculateCircle(Point p1, Point p2, Point p3)
        {
            double midX1 = (p1.X + p2.X) / 2;
            double midY1 = (p1.Y + p2.Y) / 2;
            double midX2 = (p2.X + p3.X) / 2;
            double midY2 = (p2.Y + p3.Y) / 2;

            double slope1 = -(p2.X - p1.X) / (p2.Y - p1.Y);
            double slope2 = -(p3.X - p2.X) / (p3.Y - p2.Y);

            double centerX = (slope1 * midX1 - slope2 * midX2 + midY2 - midY1) / (slope1 - slope2);
            double centerY = slope1 * (centerX - midX1) + midY1;

            double radius = Math.Sqrt(Math.Pow(centerX - p1.X, 2) + Math.Pow(centerY - p1.Y, 2));
            return (new Point(centerX, centerY), radius);
        }

        /// <summary>
        /// 円弧の開始角度と終了角度を計算
        /// </summary>
        /// <param name="center">円の中心</param>
        /// <param name="start">円弧の始点</param>
        /// <param name="end">円弧の終点</param>
        /// <returns>開始角度、終了角度</returns>
        public static (double startAngle, double endAngle) CalculateAngles(Point center, Point start, Point end)
        {
            double startAngle = Math.Atan2(start.Y - center.Y, start.X - center.X);
            double endAngle = Math.Atan2(end.Y - center.Y, end.X - center.X);
            return (startAngle * (180 / Math.PI), endAngle * (180 / Math.PI));
        }
    }
}
円弧描画ロジックを MainWindow.xaml.cs に追加
1.マウスボタン押下時の処理に円弧の場合3点を描画完了の処理を追加する
// マウスボタン押下時の処理
        private void Canvas_MouseLeftButtonDown(object sender, MouseButtonEventArgs e)
        {
            _points.Add(e.GetPosition(DrawingCanvas));

            if(this._hiCadViewModel.ToolType == DrawToolType.Arc)
            {
                if(_points.Count == 3) // 円弧は3点で描画完了
                {
                    this.endDraw();
                }
            }
            else if (_points.Count == 2) // 2点で描画完了
            {
                this.endDraw();
            }
        }
2.図形作成関数createShapeに円弧の作成処理を追加する
/// <summary>
        /// 図形作成
        /// </summary>
        /// <param name="pointlist"></param>
        /// <param name="brush"></param>
        /// <returns></returns>
        private Shape createShape(List<Point> pointlist, SolidColorBrush brush)
        {
            Shape shape = null;

            if(pointlist.Count < 2)
            {
                return shape;
            }

            // ツールに応じた図形を作成
            if (this._hiCadViewModel.ToolType == DrawToolType.Line ||
                (this._hiCadViewModel.ToolType == DrawToolType.Arc && pointlist.Count == 2)) // 円弧は2点の場合、直線描画する
            {
                var line = new Line
                {
                    Stroke = brush,
                    StrokeThickness = 1,
                    X1 = pointlist[0].X,
                    Y1 = pointlist[0].Y,
                    X2 = pointlist[1].X,
                    Y2 = pointlist[1].Y
                };

                shape = line;
            }
            else if (this._hiCadViewModel.ToolType == DrawToolType.Rectangle)
            {
                var rect = new Rectangle
                {
                    Stroke = brush,
                    StrokeThickness = 1,
                    Fill = Brushes.Transparent,
                };

                double width = Math.Abs(pointlist[0].X - pointlist[1].X);
                double height = Math.Abs(pointlist[0].Y - pointlist[1].Y);
                rect.Width = width;
                rect.Height = height;

                Canvas.SetLeft(rect, Math.Min(pointlist[0].X, pointlist[1].X));
                Canvas.SetTop(rect, Math.Min(pointlist[0].Y, pointlist[1].Y));

                shape = rect;
            }
            else if(this._hiCadViewModel.ToolType == DrawToolType.Circle) // 円
            {
                Ellipse ellipse = new Ellipse()
                {
                    Stroke = brush,
                    StrokeThickness = 1,
                    Fill = Brushes.Transparent,
                };
                double x = Math.Abs(pointlist[0].X - pointlist[1].X);
                double y = Math.Abs(pointlist[0].Y - pointlist[1].Y);
                double r = Math.Sqrt(x * x + y * y);
                ellipse.Width = r * 2;
                ellipse.Height = r *2;

                double left = Math.Min(pointlist[0].X, pointlist[1].X) - r;
                double top = Math.Min(pointlist[0].Y, pointlist[1].Y) - r;
                Canvas.SetLeft(ellipse, left);
                Canvas.SetTop(ellipse, top);
                shape = ellipse;
            }
            else if(this._hiCadViewModel.ToolType == DrawToolType.Arc)
            {
                // 円弧の描画処理
                if (pointlist.Count != 3) return shape;

                var (center, radius) = GeometryHelper.CalculateCircle(pointlist[0], pointlist[1], pointlist[2]);
                var (startAngle, endAngle) = GeometryHelper.CalculateAngles(center, pointlist[0], pointlist[2]);

                var arc = new PathGeometry();
                var figure = new PathFigure { StartPoint = pointlist[0] };
                var arcSegment = new ArcSegment
                {
                    Point = pointlist[2],
                    Size = new Size(radius, radius),
                    IsLargeArc = endAngle - startAngle > 180,
                    SweepDirection = SweepDirection.Clockwise
                };

                figure.Segments.Add(arcSegment);
                arc.Figures.Add(figure);

                Path arcPath = new Path()
                {
                    Stroke = brush,
                    StrokeThickness = 1,
                };
                arcPath.Data = arc;
                shape = arcPath;
            }

            return shape;
        }
createShape関数の変更点を解説します。
- 円弧は3点で描画するため、pointlistのポイント数は2より少ない場合作成しないように変更。
- 円弧pointlistは2点の場合、直線と扱います処理を追加。
- 円弧の作成ロジックを追加。
結果の表示
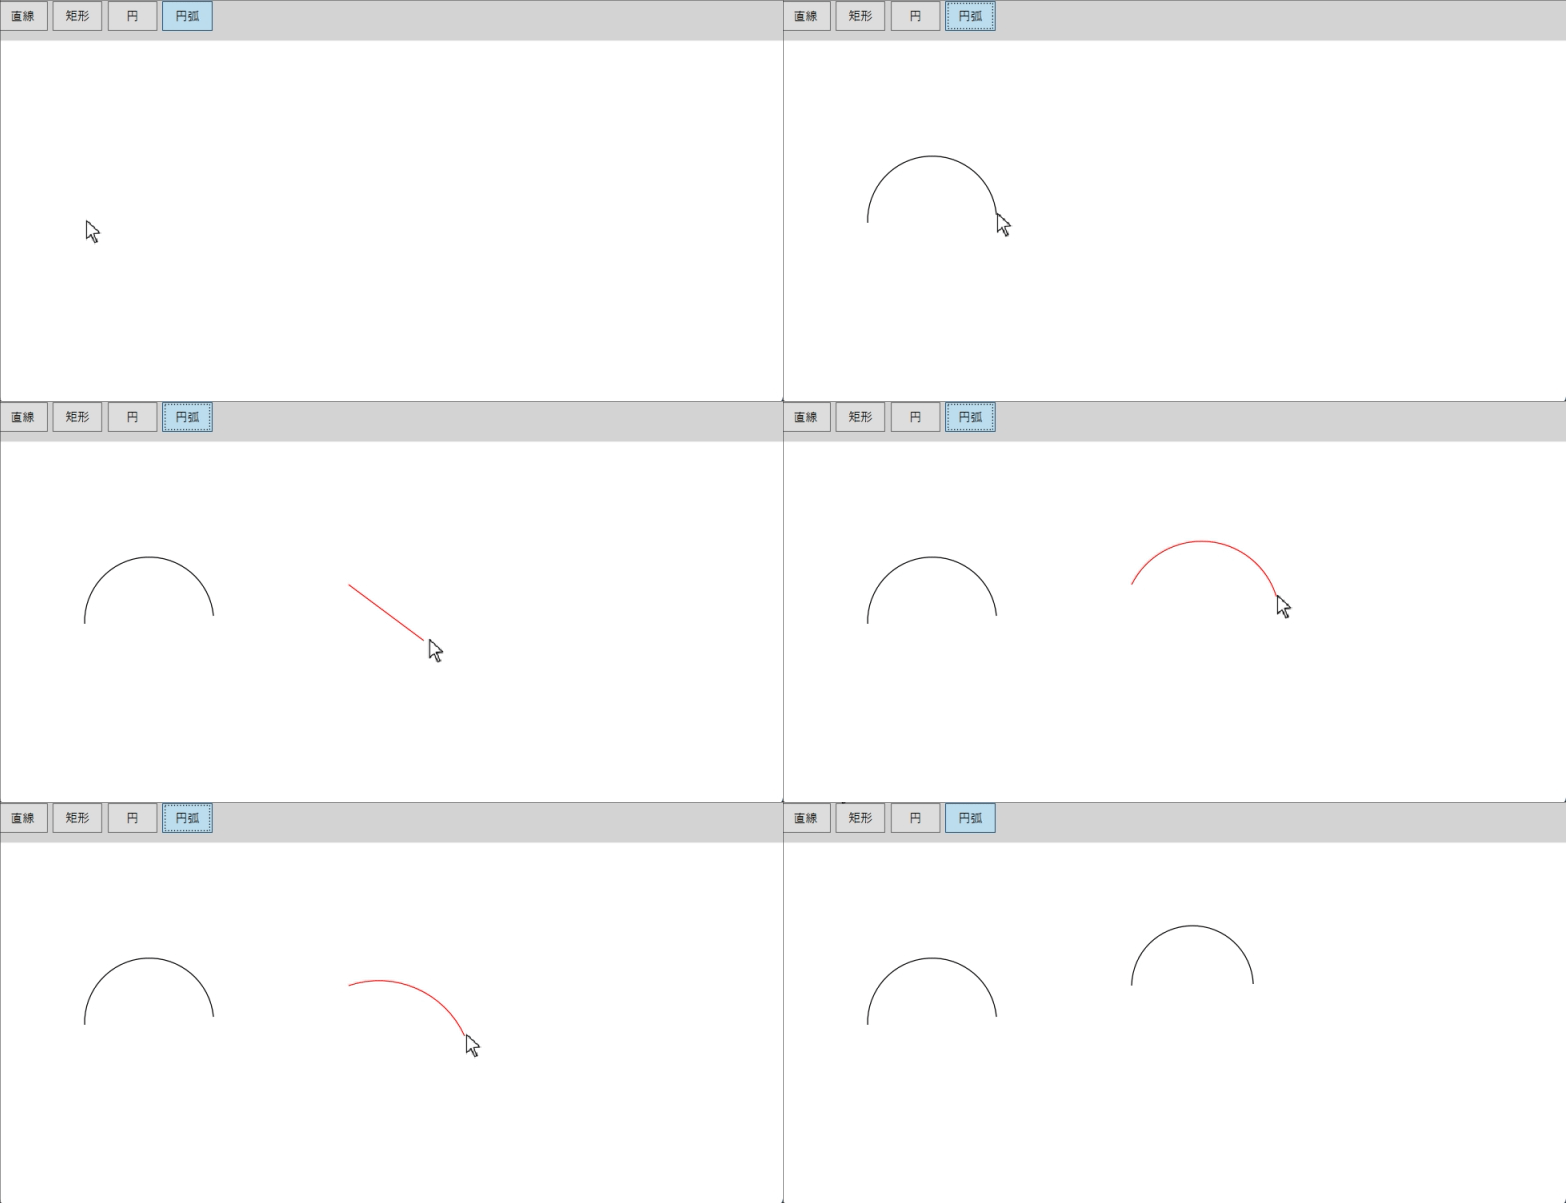
ユーザが3 点を指定して円弧を描画することができました。ただし、まだ問題があります。以下動作の通り、上向きの円弧を作成しようとすると、作成できません。ユーザ指定した中間点が通らない円弧を作成されます。次の記事はこの問題解決する方法を解説します。


コメント